Quick Start Guide
Go from a new account to your first AI-assisted brief in under five minutes.
Overview
This guide takes you through the most direct path to value in Hamster Studio: create your account, complete the setup wizard, start a conversation with the AI assistant, and turn the output into a brief. By the end you will understand the core loop that most teams use every day — conversation to brief to plan.


Before You Begin
You need a Hamster Studio account. If you do not have one yet, see Creating Your Account. If your organization is in early access, you will need either an approved waitlist request or a team invitation before you can sign up.
Step 1 — Sign Up and Verify Your Email
- Open Hamster Studio and select Create an account (or follow the link in your invitation or waitlist approval email).
- Enter your email address and choose a password.
- Check your inbox for a verification email and click the link inside.
You are taken directly into the onboarding wizard after verification.
Step 2 — Complete the Onboarding Wizard
The wizard takes about two minutes. Work through each step:
- Add your role — Select the role that best describes your position, such as Product Manager or Designer. This is required to proceed.
- Name your workspace — Give your team workspace a name if prompted. This step is skipped if your workspace already has a name.
- Personalize (optional) — Enter your company website URL or upload a document such as a strategy deck or product roadmap. This gives the AI assistant background context on your product. You can skip this now and add it later from Context Settings.
- Invite teammates (optional) — Enter up to five colleague email addresses to send invitations. You can also skip this and invite people from the Members page.
Select Get Started on the final step. You are now inside your workspace.
Step 3 — Start a Conversation
You land on the New Chat page. This is the home of your workspace and where you talk to the AI assistant.
- Click in the message input at the bottom of the screen.
- Describe what you are working on. For example: "We are redesigning the mobile checkout flow for first-time buyers. What are the key product decisions we need to make before we start building?"
- The assistant replies with structured thinking based on your question.
Keep the conversation going by asking follow-up questions, asking it to explore a specific angle more deeply, or asking it to summarize the key points.
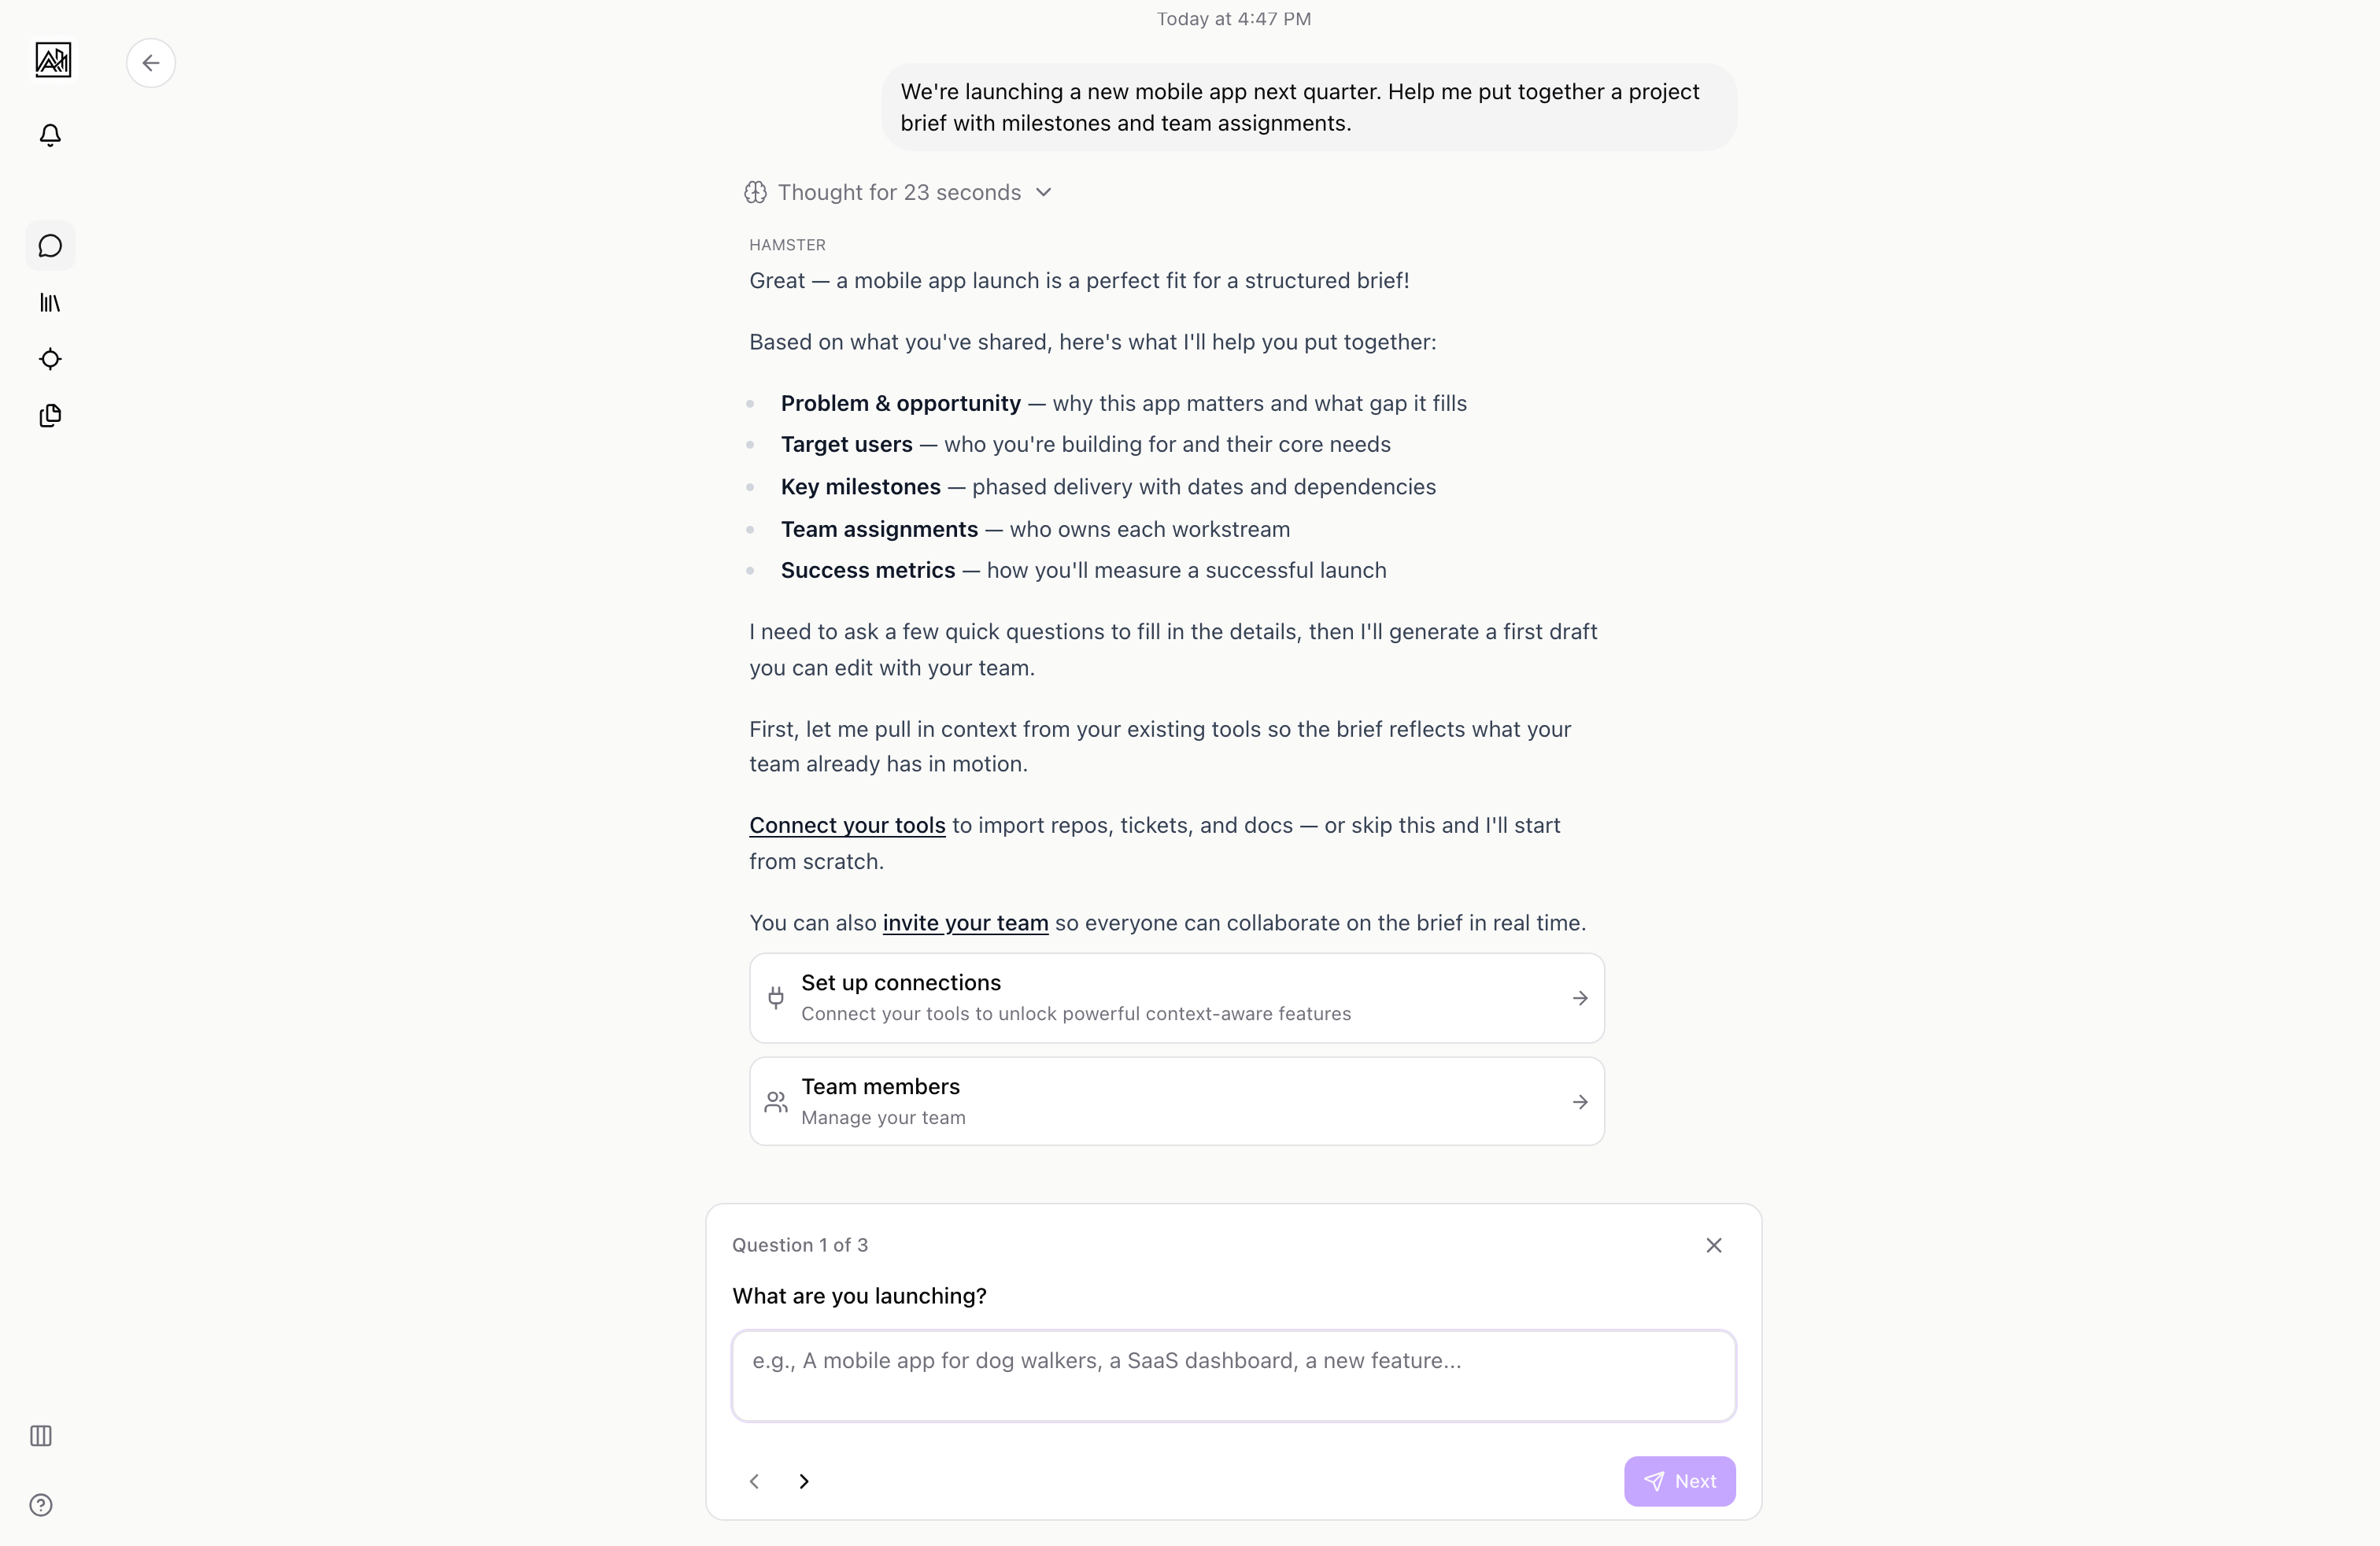
Step 4 — Create a Brief from the Conversation
A brief is a structured document for a project, feature, or initiative. You can create one directly from a conversation.
- In the conversation, ask the assistant to create a brief: "Turn this into a brief."
- The assistant drafts a brief based on the conversation context — including the problem, goals, and any decisions you have discussed.
- Review the draft, give it a title, and save it. It appears in your Briefs list in the sidebar.
From the brief you can continue editing, add supporting documents, invite teammates to review it, and generate a structured plan when you are ready to move to delivery.
Where to Go Next
- Edit and develop your brief — Creating Briefs
- Generate a task plan from your brief — Generating Plans
- Connect your tools for richer context — Connections Overview
- Invite your team to the workspace — Inviting Members
- Learn the sidebar and workspace layout — Navigating Studio
You do not need a perfectly formed question to start a conversation. A rough description of a problem or idea is enough — the assistant will ask clarifying questions if needed.
Tips
- Conversations are saved automatically. You can return to any previous conversation from the New Chat page's history list on the left side of the screen.
- Briefs created from conversations carry the thread context, so the AI assistant can reference the original discussion when helping you develop the brief further.
- The onboarding wizard can be re-opened at any time from the account selector in the sidebar if you want to update your workspace name, role, or context documents.