Inviting Members
Add colleagues to your team workspace by sending them an email invitation they can accept in one click.
Overview
Team members join Hamster Studio through email invitations. When you invite someone you select the role they will have when they join. They receive an email with a link that takes them directly into the workspace — or through sign-up first if they do not yet have an account.
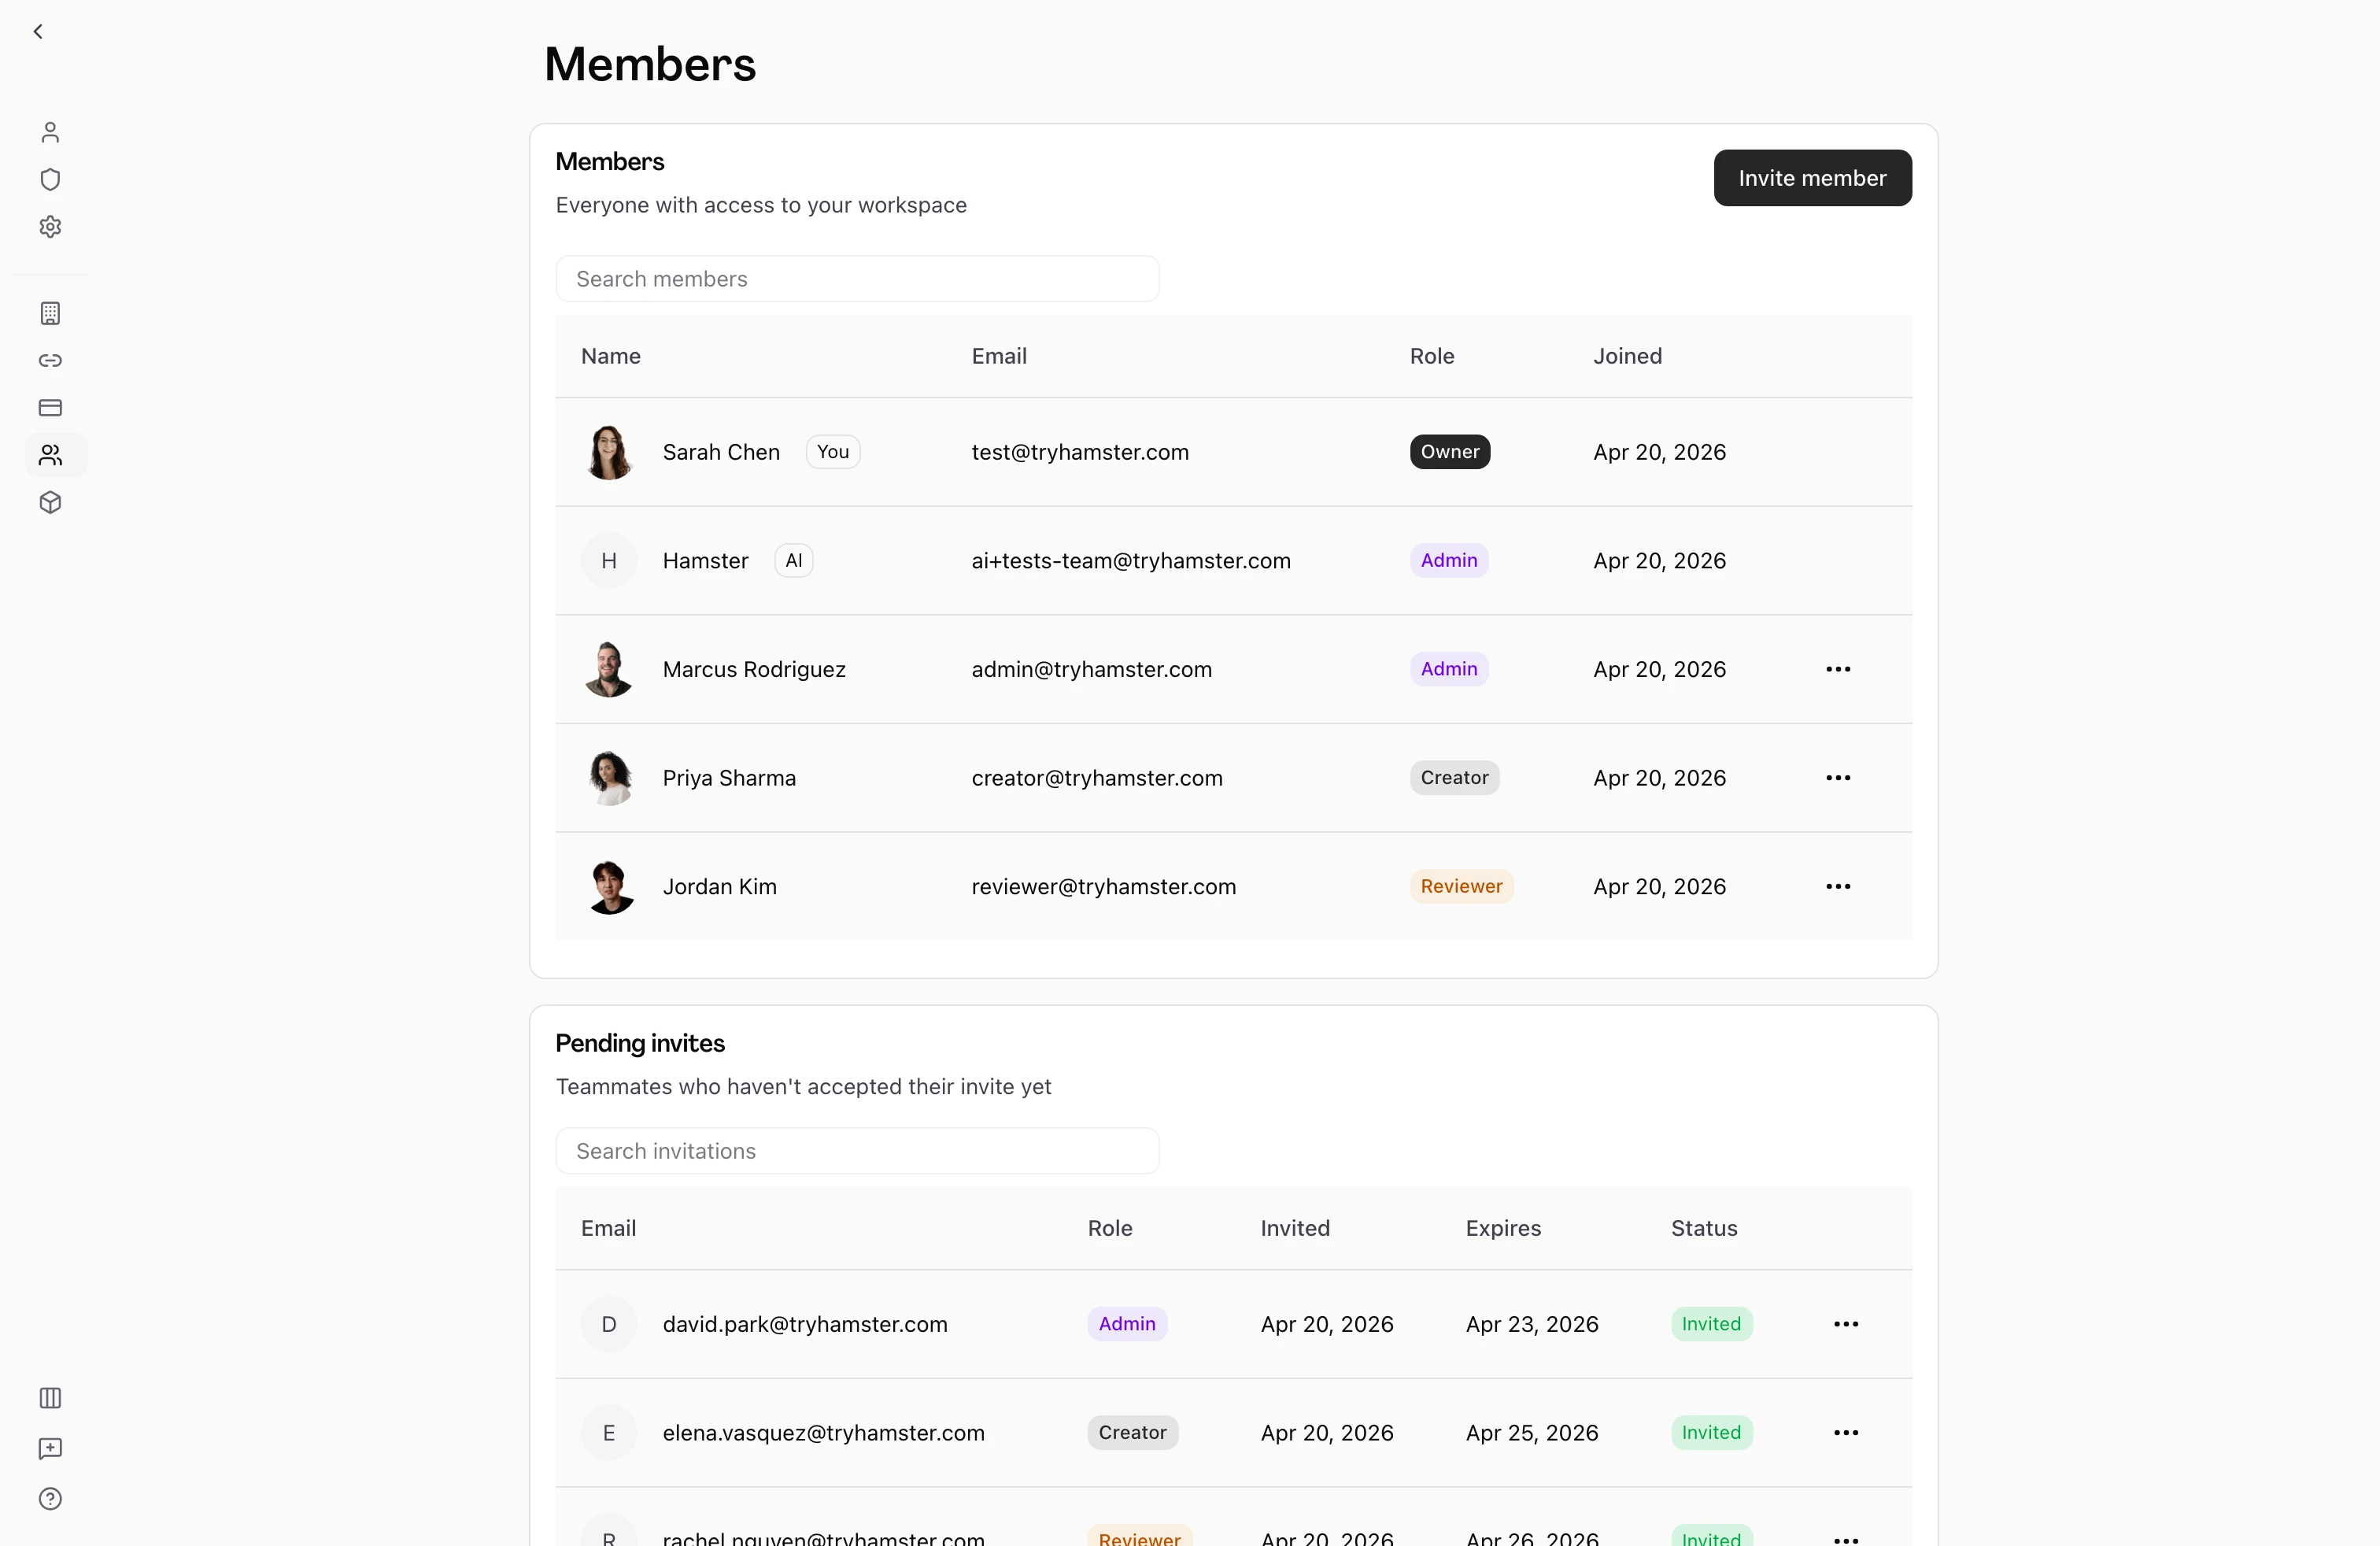
Only owners and admins can send invitations (they have the invites.manage permission).
How It Works
- Go to the Members page — Open your team workspace and select Members in the sidebar.
- Select "Invite Members" — A dialog opens. This button is only visible if you have permission to send invitations.
- Add email addresses and roles — Enter the email address of the person you want to invite and select their role (Admin, Creator, or Reviewer). You can add up to 25 invitations at once by selecting "Add another". A hint appears when you've reached the maximum.
- Send the invitations — Select the send button. Each person receives an email with an invitation link.
- Track pending invites — Invitations that have not yet been accepted appear in the Pending Invites section below the members table. You can update the role on a pending invitation or remove it before it is accepted.
The Invitation Flow for Recipients
When someone receives an invitation:
- They click the link in the email. The link includes a unique token tied to their email address.
- If they already have a Hamster Studio account, they are taken to an acceptance page that shows the team name and logo. They select Join to become a member.
- If they do not have an account, they are redirected to the sign-up page. After completing sign-up they are taken back to the invitation acceptance page automatically.
- Once they accept, they are added to the team with the role that was selected when the invitation was sent, and they land directly in the team workspace.
Invitations are tied to a specific email address. If someone tries to accept an invitation from a different account, it will not work — they need to sign in with the invited address or sign up using it.
Managing Pending Invitations
Invitations that have not been accepted remain visible in the Pending Invites table. From there you can:
- Update the role — Change the role assigned to the invitation before it is accepted. This is useful if someone's responsibilities change between when you sent the invite and when they join.
- Remove an invitation — Delete an invitation to prevent it from being accepted. The link in the invitation email will stop working immediately.
- Renew an invitation — If an invitation has expired you can renew it, which sends a fresh link to the same address.
Key Capabilities
- Batch invites: Send up to 25 invitations in a single action.
- Role assignment at invite time: Choose the role someone will have when they join — Admin, Creator, or Reviewer.
- Pending invite management: Update or cancel invitations at any time before acceptance.
- New user onboarding: Invitees who do not have accounts are guided through sign-up and arrive in the workspace automatically.
Tips
- If an invitee does not receive the email, ask them to check their spam folder. You can also remove the invitation and send a new one to trigger a fresh email.
- You can only assign roles at or below your own level. An owner can invite as Admin, Creator, or Reviewer; an admin can invite as Admin, Creator, or Reviewer. Creators and reviewers cannot send invitations.
- Accepted invitations are not visible in the pending table — once someone joins they appear in the main Members list.