Task Editing
Update status, adjust priority, edit descriptions, add notes, and manage subtasks — all without leaving the task.
Overview
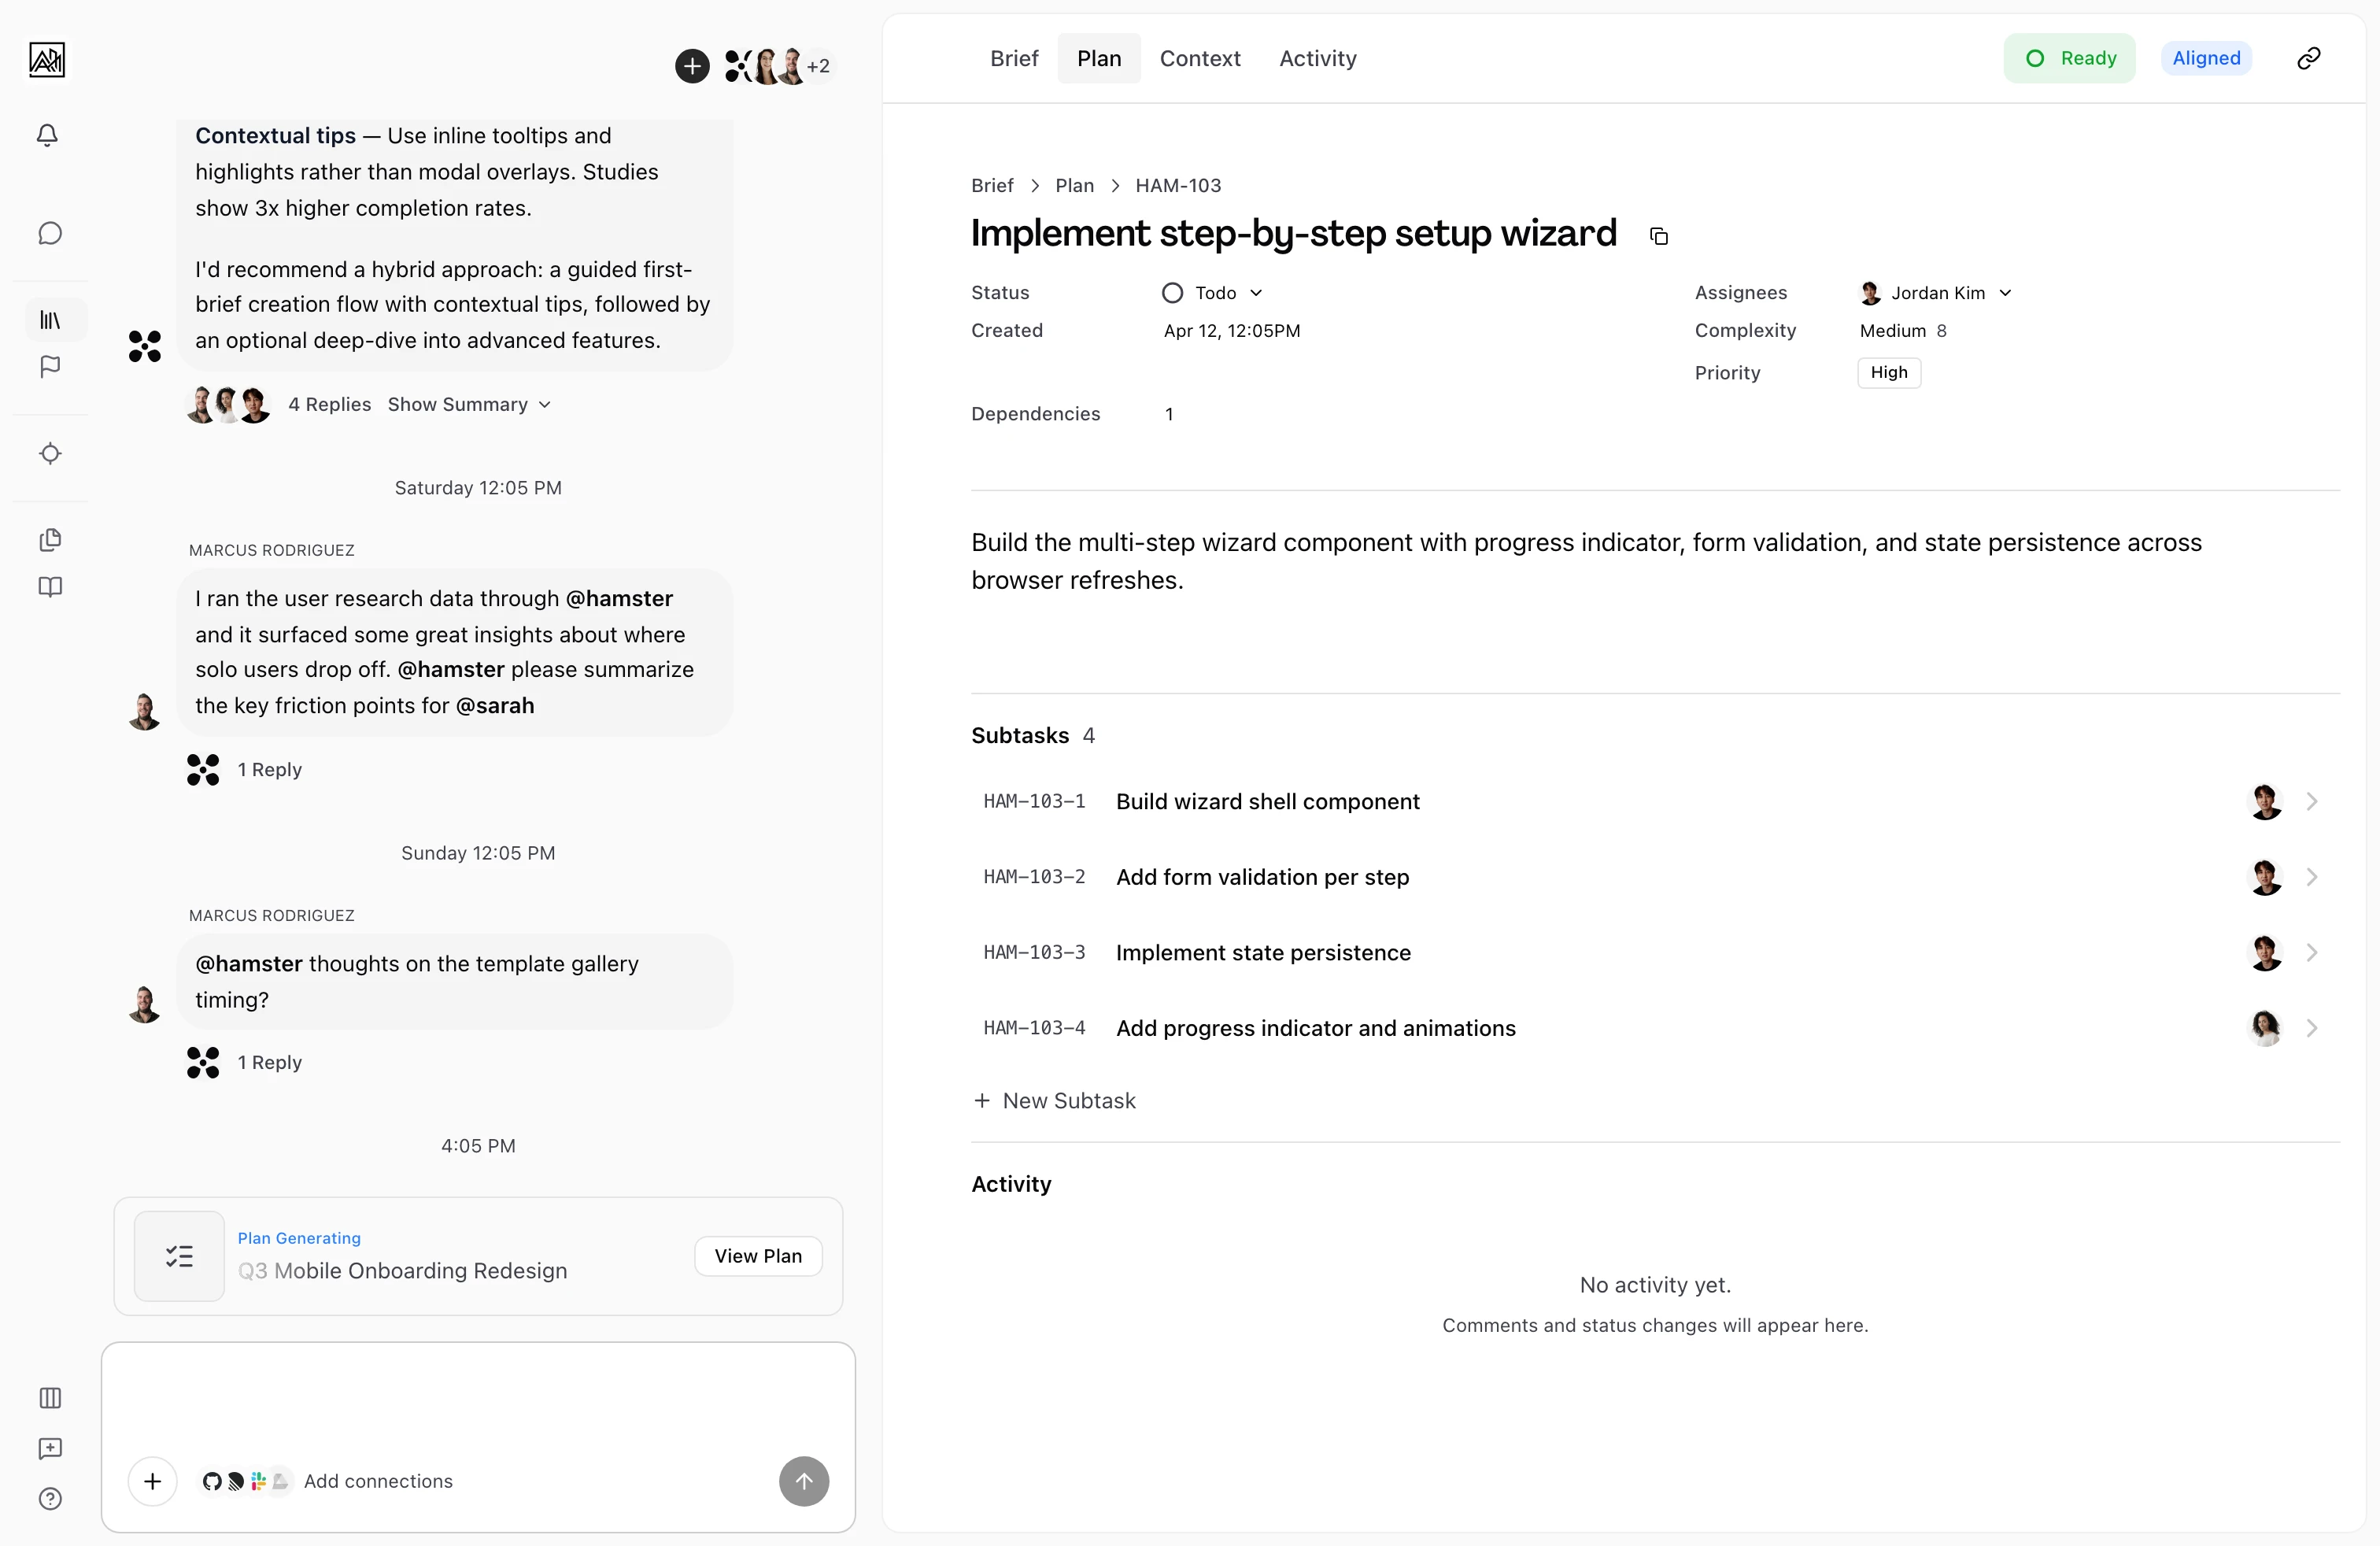
Tasks are working documents. They start with AI-generated content from the Plan, but they are meant to be shaped as work progresses. You can update a Task's status, change its priority, edit its description to add context or acceptance criteria, and add subtasks to break down work that turns out to be larger than expected. All edits save immediately and are reflected across the Plan list in real time.
Updating Status
Tasks have three states: Todo, In Progress, and Done.
From the Task detail page: Click the Status field in the metadata grid. A dropdown appears with all three options. Click any status to apply it immediately.
Drag-and-drop in grouped list view: When Tasks are grouped by status, drag a Task row from one section to another. The status updates as it crosses the section boundary.
Drag-and-drop in kanban view: Switch to kanban mode using the Display button. Tasks appear as cards in columns corresponding to their status. Drag a card to a different column to change its status, or within a column to reorder. Both operations save immediately.
Updating Priority
Priority levels are Low, Medium, High, and Urgent. The Plan generator sets an initial priority, which you can change at any time.
From the Task detail page, click the Priority field in the metadata grid. Select the level you want. The change saves immediately. Priority is not shown on Task rows in the list view, but is always visible on the Task detail page.
Editing the Description
The Task description is a rich-text document in the main body of the Task detail page. It is editable by default — no separate edit mode is required.
Click anywhere in the content area and begin typing. You can edit the AI-generated text, add headings, bullet lists, numbered lists, and other formatting, write implementation notes or acceptance criteria, and record decisions or reference links. Content auto-saves as you type. Description edits do not affect the Brief or plan.
Managing Subtasks
Adding a subtask manually
From inside any Task detail page, scroll to the Subtasks section. Click "Add Subtask". An inline input appears — type the subtask title and press Enter to create it, or Escape to cancel.
Generating subtasks with AI
When a Task has no subtasks, an "Expand Subtasks" button appears next to "Add Subtask". Clicking it sends the Task to the AI, which reads the Task description and broader Brief context and generates a structured set of subtasks. Results stream in as they are created — you will see them appear without needing to reload. Once generated, each subtask can be edited, reordered, or deleted independently.
The "Expand Subtasks" button only appears when the Task has no subtasks yet.
Reordering subtasks
Drag any subtask row up or down within the Subtasks section to reorder it. The new order saves immediately.
Opening a subtask
Click any subtask to open its own Task detail page. Subtask detail pages have the same layout as top-level Tasks — you can view and edit the description, update status, assign it, and add further nested subtasks.
Display Options
The Plan tab includes a Display button that controls how Tasks appear in the list without changing the Tasks themselves:
- View: Switch between List and Kanban. List view shows Tasks as rows. Kanban view shows Tasks as cards in columns.
- Group By: Choose None for a flat ordered list, or Status to group Tasks into Todo, In Progress, and Done sections. Grouping is available in both List and Kanban view.
Key Capabilities
- Inline status changes: Status can be changed from the Task row in the list and from the metadata grid in the Task detail page.
- Drag-to-reorder and drag-to-status: Tasks and subtasks can be reordered by dragging. In grouped and kanban views, dragging across sections changes status.
- Live rich-text editing: The description editor is always active. Edits save automatically and appear instantly for anyone viewing the task.
- AI subtask generation: "Expand Subtasks" generates a structured breakdown asynchronously, streaming Results in real time.
- Manual subtask creation: "Add Subtask" provides a fast inline form for creating subtasks without navigating away.
Tips
- Use the description editor to capture the definition of done for each Task when it is first generated. Clear acceptance criteria reduce back-and-forth later.
- If you are planning work across a team, generate the Plan and then use the kanban view grouped by status to drag Tasks into priority order before assigning them.
- Moving a Task back from Done to In Progress is fully supported — rework is normal. The Task will reappear in the In Progress column for the team to see.